The next step is to set up permissions for those features of your app that require parental consent. For example, your app might need permission to send a welcome magazine to a child, or to collect the child’s email address.
This step includes defining some text (or ‘copy’) to describe each permission and why it is required. This copy is displayed to the parent and the user.
Define your app’s permissions and copy
You cannot set up permissions and copy yourself. Instead, contact your Implementation Manager who will help you to define what permissions you need and build them into your user experience.
For each permission, you need to provide the following information:
| Description | Format | |
|---|---|---|
| Name | A title for the permission; for example, ‘Welcome Magazine’ or ‘Location’. | Maximum 20 characters |
| Description for parents | The description of the permission that will be displayed to the parent in the Parent Portal and in emails to the parent. | Maximum 255 characters |
| Description for children | The description of the permission that will be displayed to the child in your SSO view during the sign-up process. | Maximum 255 characters |
| Link to privacy policy | A link to your app’s privacy policy. | HTTPS URL |
| Link to privacy notice | A link to your app’s privacy notice. | HTTPS URL |
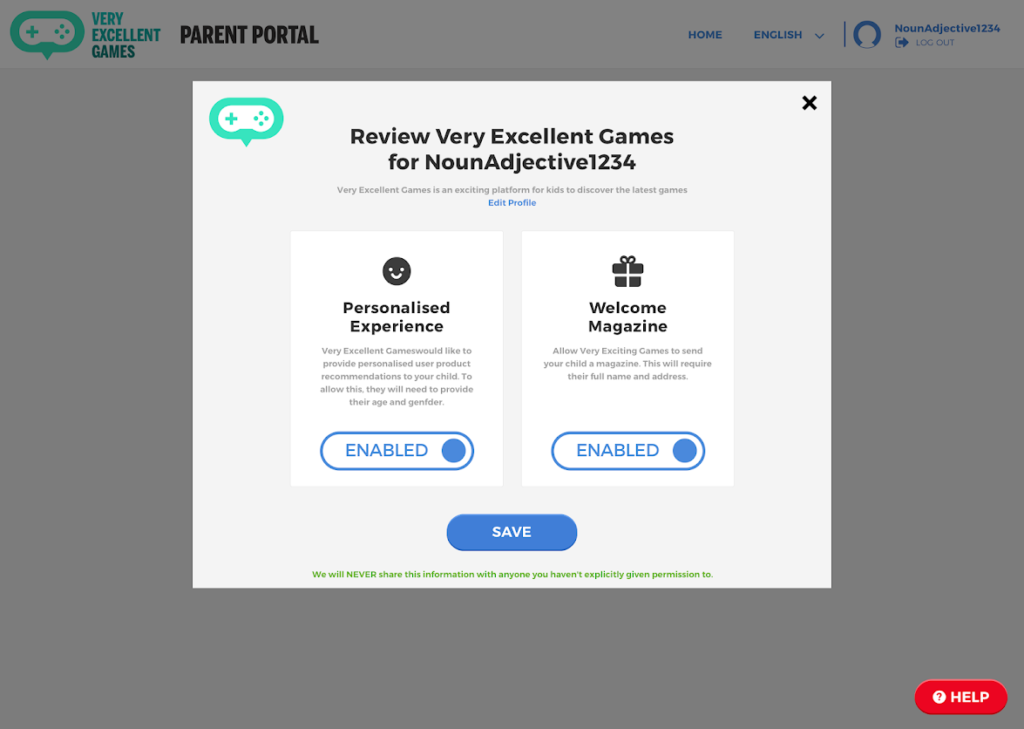
This example shows how the titles and descriptions for two permissions are displayed to the parent in the Parent Portal:
View permissions in the Control Panel
Once your Implementation Manager applies your permissions and copy, you can view them in your KWS Control Panel. To do this, select the required app, and then click Settings > Permissions:
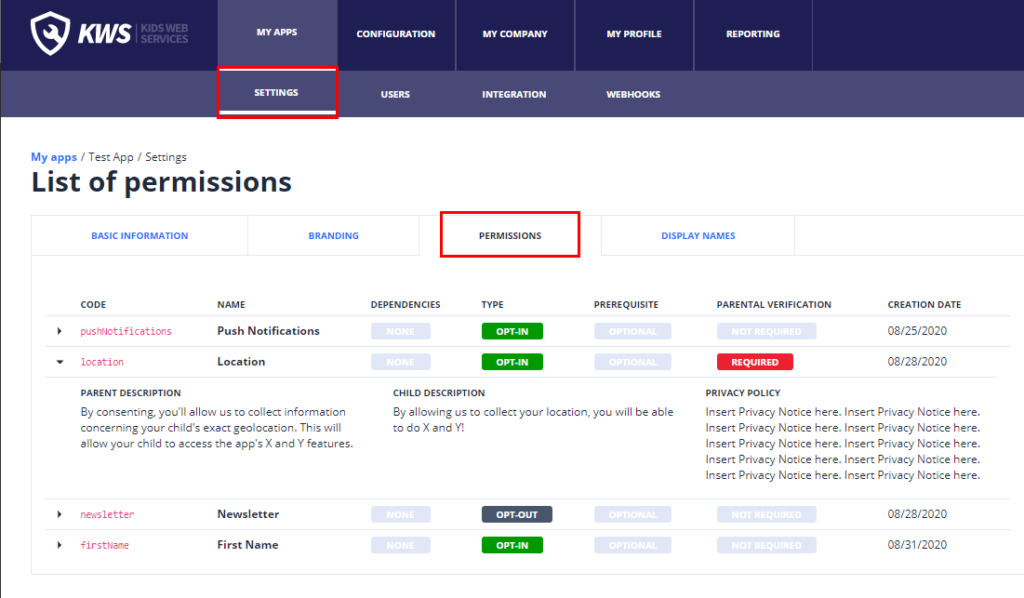
The List of permissions displays the following information about each permission:
| Item | Description |
|---|---|
| Code | The permission code. When you build your authentication flow, this is the value that you pass to the KWS API to trigger an email to the parent requesting that they grant or review their child’s permissions. |
| Name | The name of the permission. This is displayed to parents and users. |
| Dependencies | The name of a permission that must be granted before this permission can be granted. For example, assume your app has 2 permissions: ‘Email’ and a weekly ‘Newsletter’. Because you need to know the child’s email address before you can send the newsletter, the ‘Newsletter’ permission has Dependencies set to ‘Email’. |
| Type | This is the type of parental consent required for this permission. – Opt-in (email plus) consent means the parent has to explicitly grant the permission before the child has access to the feature. – Opt-out consent means the parent is simply notified that their child is using the feature. The parent has to explicitly revoke permission (opt out) at any point if they don’t want their child to do this. |
| Prerequisite | Required / Optional If ‘Required’, the permission is a precondition to the service and cannot be revoked. |
| Parental verification | Required / Not required If ‘Required’, the permission is granted only if the parent has been verified as being an adult. For more information, see Parental consent and verification. |
| Creation date | The date the permission code was created in KWS. |
| Parent description | The description of the permission that the parent sees in the Parent Portal. |
| Child description | The description of the permission that the user sees in the SSO view. |
| Privacy policy | The URL to your app’s privacy notice. |
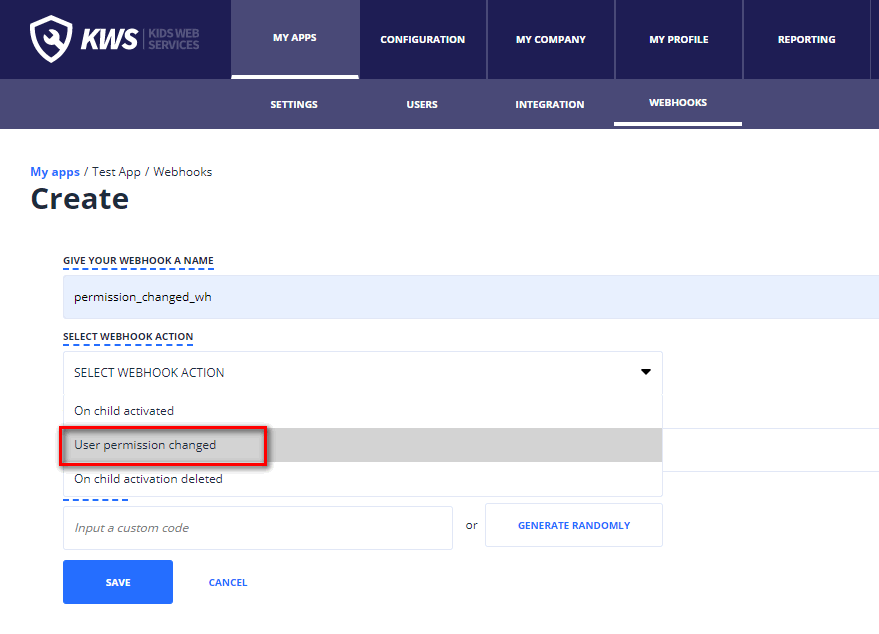
Trigger a webhook when permissions change
You need a webhook to notify your application backend with an HTTP call when a user’s permissions change so that your backend can correctly manage access to the features of your app.
To create the webhook, follow the instructions in Set up webhooks and set the Webhook action to ‘User permission changed’.
Localise permissions
If your app or website will be available in multiple regions, you may wish to localise your app’s permissions.